You are inspired by the SQL tutorial and you decided you want to install a database on your Windows PC. So, you do a Google search to see how this is done. Then you realize that there is a large variety of relational databases you can install. Not only that, as you browse through the different pages, you find the installation instructions for all of them are complicated. First you need to figure out which version you should download and install, then you have to go through multiple pages to find the right instructions. Pretty soon you realized that installing a database on your PC feels like a major project in itself.
This blog shows a simpler way. Assuming your goal is simply to have a database so you can practice your SQL skills, my recommendation is to go with SQLite3 for its ease of installation, its ease of use, and its small storage requirements. One thing to note with SQLite3 is that it does not have all the SQL features (here is a short list of common SQL features not available in SQLite3). Having said that, the truly important features are included.
There are two ways to install SQLite3: The first is to install download and install directly from SQLite’s official website, the second is to install via the Anaconda package. Either method works, and we’ll provide instructions for doing both below.
Download from SQLite’s official website
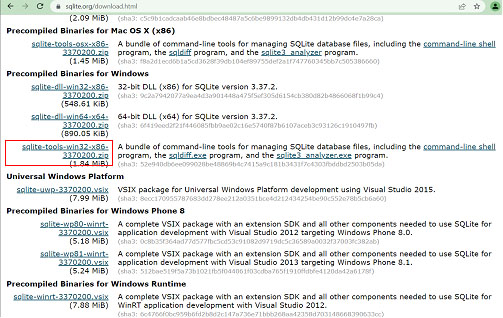
Step 1: Go to SQLite’s official download page at https://sqlite.org/download.html.
Step 2: Click on the file that starts with sqlite-tools-win32 to download it to your machine (highlighted in red below).
Step 3: Create a new directory on your drive. If you want the files to reside in C:\sqlite3, navigate to C:\ using Command Prompt, then type in “mkdir sqlite3”.
Step 4: Double click on the downloaded ZIP file, then extract all the files into the C:\sqlite3 directory (or the directory you specified). There are three files, and all three of them combined require about 3 MB of space.
Step 5: Now the installation is complete. To run SQLite3, open Command Prompt, navigate to C:\sqlite3, and enter “sqlite3” to get into the user interface.
Use the Anaconda distribution
Step 1: SQLite3 is part of the Anaconda distribution. Anaconda bills itself as the “data science toolkit” and is primarily a distribution of Python and R. At the same time, it includes SQLite3 as a lightweight database. Go to Anaconda site and download the Anaconda distribution.
Step 2: Double click on the Anaconda download to start the installation.
Step 3: Follow the prompts. You can safely select the default value when prompted.
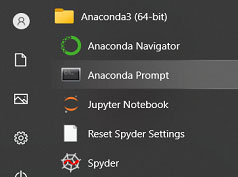
Step 4: Once installation is completed, you can start using SQLite3. To get to SQLite3, start with the Windows prompt at the lower left hand side of your screen, go to Anaconda3 (64-bit), then Anaconda Prompt (see image below).
Step 5: A window that looks similar to Command Prompt will show up. Type in “sqlite3”, and you are inside the database. Now you can practice your SQL.
As an alternative, you can also use the Command Prompt. However in this case you’ll need to navigate to the exact path where the SQLite.exe file is located. On my machine this is “C:\Users\C\Anaconda3\envs\new\Library\bin”. Since this is more troublesome to get to compared to just simply using the Anaconda Prompt, I recommend using the Anaconda Prompt.
Note that when you just type in “sqlite3” (after either installation method), you’ll get a message saying “Connected to a transient in-memory database.” This means whatever you store in the database will disappear when you exit. To connect to a physical database, type in the database name after “sqlite3.” For example, if your database name is “flower,” you’ll want to type “sqlite3 flower.db” and you’ll be connected to the flower database.